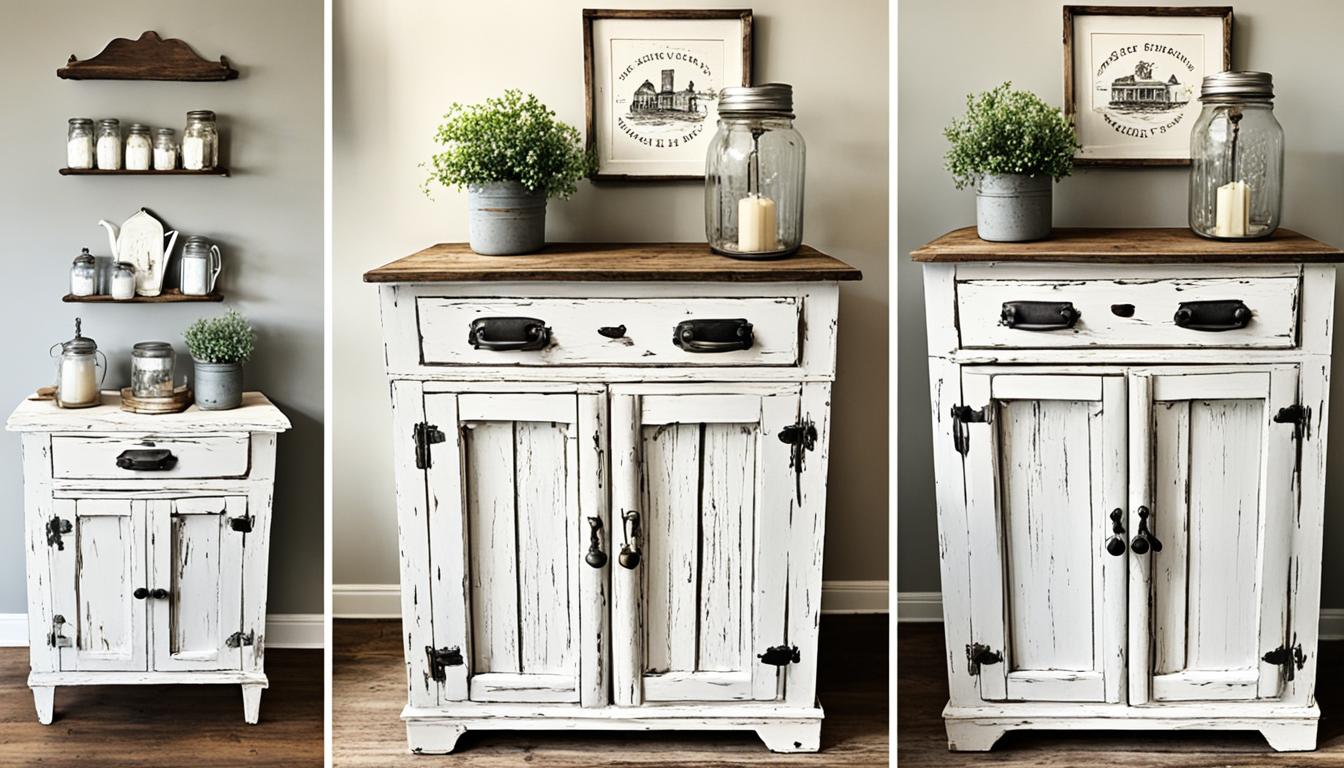
Transform your outdated or newly purchased Antique Farmhouse cabinet into a stunning piece with a chippy paint makeover. Adding a touch of vintage charm to your space has never been easier! In this step-by-step guide, we will show you how to achieve that coveted antique farmhouse look using the chippy paint technique.
With just a few simple steps, you can give your cabinet a whole new lease on life, creating a statement piece that will elevate the style of your farmhouse-inspired home.
Note: The image above showcases the beautiful transformation you can achieve with the chippy paint technique.
Step 1: Preparing the Cabinet
Before starting the chippy paint process, it is important to properly prepare the cabinet. This step is crucial to ensure that the paint adheres well and the final result is smooth and professional-looking. In this section, we will discuss the necessary steps to clean, sand, and repair the cabinet surface.
Cleaning the Surface
The first step in preparing the cabinet is to clean the surface thoroughly. Remove any dust, dirt, or grime using a gentle cleanser or a mixture of water and mild detergent. Make sure to remove all grease and stains, as they can affect the paint’s adhesion.
Sanding the Surface
Once the surface is clean and dry, it’s time to sand the cabinet. Use medium-grit sandpaper or a sanding block to roughen up the surface. This will create a slightly textured surface for the paint to grip onto. Sand in the direction of the wood grain, using long, smooth strokes. Be sure to sand all areas, including corners and edges, for a consistent finish.
Repairing and Adjusting
Inspect the cabinet for any damages or imperfections that need to be repaired. Fill in any cracks, holes, or dents with wood filler and smoothen them out using a putty knife. If there are loose or wobbly parts, tighten any screws or nails to ensure stability. Adjust any drawers or doors that are misaligned or stuck. This step is crucial for achieving a professional-looking final result.

By following these steps to properly clean, sand, and repair the cabinet, you will create the ideal surface for applying the chippy paint technique. The next section will guide you through the process of applying the chippy paint, bringing your antique farmhouse cabinet makeover to life.
Step 2: Applying the Chippy Paint
Once the cabinet is prepared, it’s time to start applying the chippy paint. This step is where the magic happens and transforms your ordinary cabinet into a charming antique farmhouse piece. We will guide you through the process of choosing the right paint and applying it to achieve the desired vintage look.
When it comes to selecting the paint, consider using chalk or milk paint for an authentic and textured finish. These types of paints are perfect for achieving the chippy look and are available in a variety of colors to suit your farmhouse aesthetic.
Here are the key techniques you need to know for applying the chippy paint:
1. Layering Paint: Start by applying a base color to the cabinet. Once dry, add a second color on top, applying it unevenly and leaving areas of the base color exposed. This layering technique adds depth and character to the piece.
2. Distressing: Use sandpaper or a sanding block to distress the painted surfaces. Focus on areas that would naturally wear over time, such as edges, corners, and raised details. The goal is to reveal some of the base color and create a worn effect.
3. Creating Chipped and Worn Areas: To achieve the signature chippy look, use a putty knife or scraper to gently chip away sections of the top paint layer. Pay attention to areas that would naturally experience wear and tear, like edges and corners. This technique will create an authentic aged appearance.
Remember to step back and assess your progress as you work. Don’t be afraid to experiment and make adjustments as needed to achieve your desired level of distressing and chipping.
Here’s an example of what you can achieve with the chippy paint technique:

“Using the chippy paint technique brought new life to my old farmhouse cabinet. The layering and distressing created a beautiful vintage look that perfectly complements my rustic decor. I couldn’t be happier with the results!” – Jennifer, farmhouse enthusiast
Step 3: Finishing Touches
Now that you have completed the chippy paint process, it’s time to add the final touches to your Antique Farmhouse cabinet. These small details will elevate the overall look of the piece and ensure it perfectly complements your farmhouse-inspired space.
First, consider applying a protective topcoat to seal and protect the chippy paint finish. This will help preserve the antique charm of your cabinet and make it more durable over time. Choose a topcoat that matches the desired sheen, such as matte or satin, and apply it according to the manufacturer’s instructions.
If you desire a more distressed appearance, you can further distress the cabinet by lightly sanding certain areas or using techniques like dry brushing to create a worn effect. This step will enhance the vintage aesthetic and give your cabinet a truly authentic farmhouse look.
Lastly, consider adding decorative elements to personalize your chippy cabinet. Updating the hardware with vintage-style knobs or handles can instantly transform the piece and add character. Additionally, stencils can be used to create patterns or motifs on the cabinet doors or sides, further enhancing the farmhouse charm.